Technical Requirement:
PHP Version – Recommended: 8.3, Minimum : 8.1.0
Database:
Mysql Version – Recommended: 8.1, Minimum 8.0.13
Xampp Version: 8.2.4
Prerequisites:
Here I assume that you installed the Xampp in your windows machine but If you did not install the Xampp yet, I will recommend to install Xampp. Please download the Xampp from https://www.apachefriends.org. Great!! and We are nice to go ahead.
Download Joomla:
Please follow the link and instructions
https://downloads.joomla.org/cms/joomla5
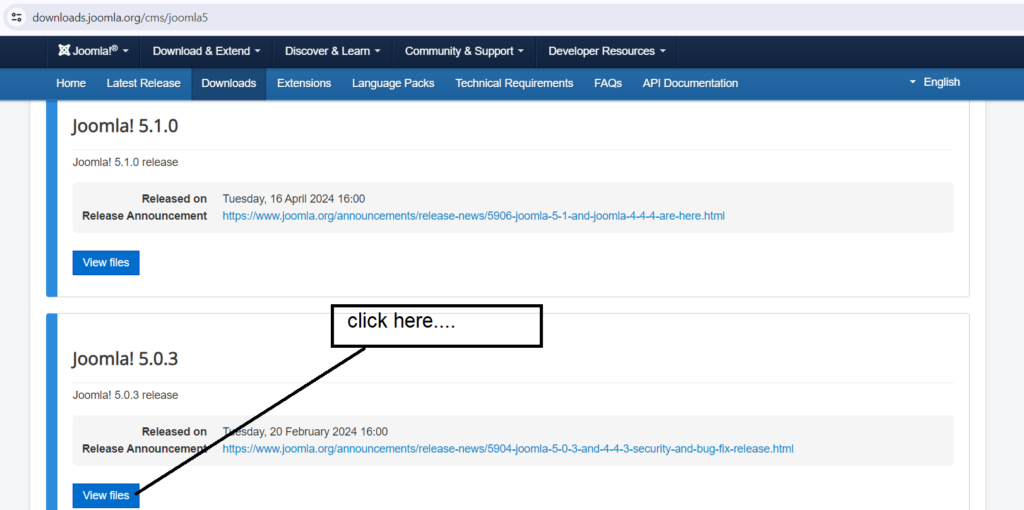
Click on “View files”(marked on the image) and You will arrive on
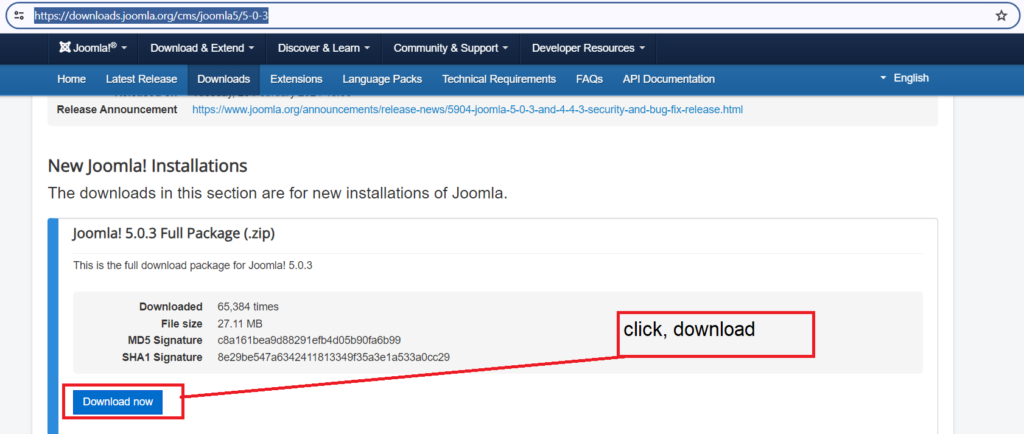
https://downloads.joomla.org/cms/joomla5/5-0-3; Here you will see the download options in different format like .zip, .tar.zip, .tar.zst; If you confused, Please follow the below screenshot. For me I am downloading the .zip version. Download the file and save it in your local machine. For me I am creating a folder at D:\xampp\htdocs\joomla5;
Now, extract the files in the same folder. You can remove the downloaded file(.zip format or any other format) or leave as it is. Finally, we are very close to installation process.
Now open your browser and put http://localhost/joomla5
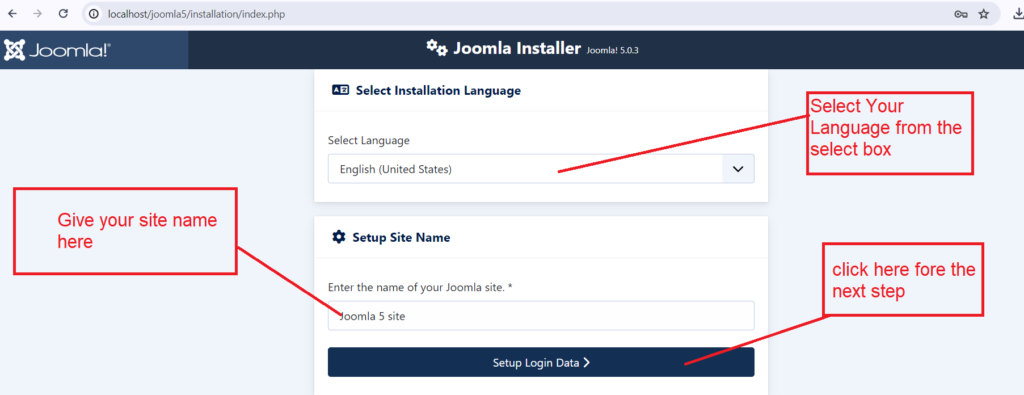
You will see some options here
1. Select the Language of your website
2. Set up the site name
3. Finally click on the “Setup Login Data”
Then click on “Setup Login Data” and you will go to the next step of installation
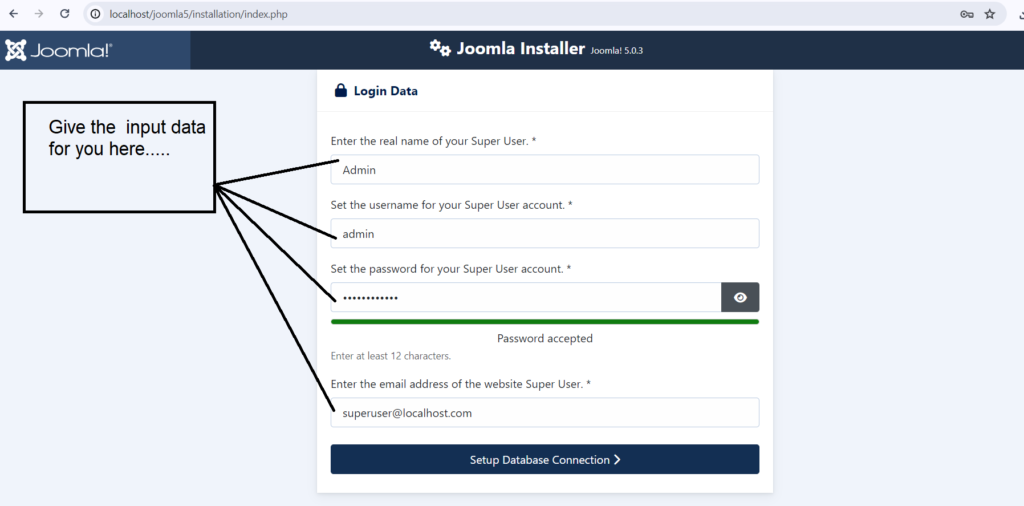
If you look at above image, You can see there are some input field. Please give the correct data in these input field. For me,
1. Enter the real name of your Super User. * — Admin
2. Set the username for your Super User account. * — admin
3. Set the password for your Super User account. * — test12345678
4. Enter the email address of the website Super User. * — superuser@localhost.com
After that click on the “Setup Database Connection” and You will go to the next step. Here you can see some input filed which will receive all of the information.
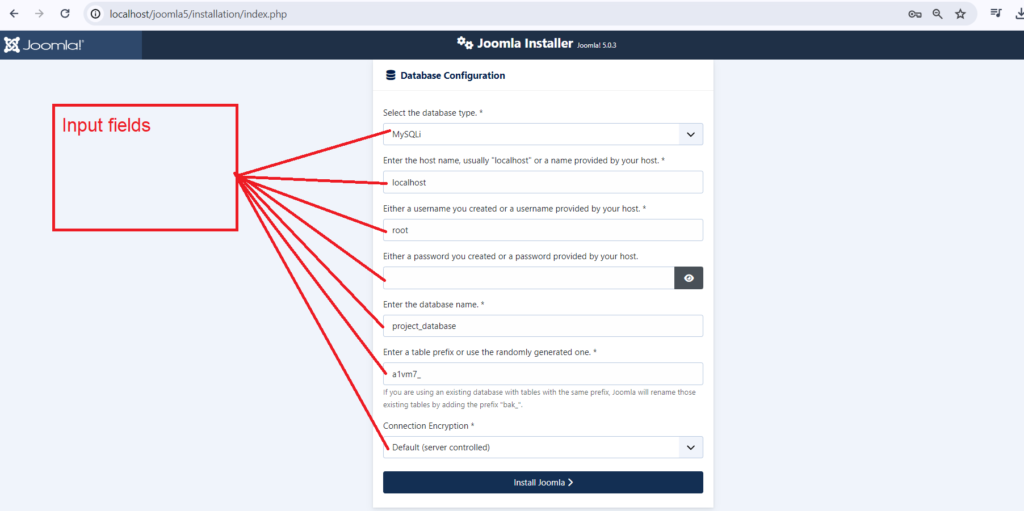
Please put correct data in these input fields. For me
1. Select the database type. * — MySQLi
2. Enter the host name, usually “localhost” or a name provided by your host. * — localhost
3. Either a username you created or a username provided by your host. * — root
4. Either a password you created or a password provided by your host. — I left it blank, my database has no password
5. Enter the database name. * — project_database
**** Remember, no need to create the database and Joomla will automatically create a database with this name.
6. Enter a table prefix or use the randomly generated one. * — a1vm7_
7. Connection Encryption * — Default(Server Controlled)
After that click on “Install Joomla” and You will arrive on the next step. This is the last step of Joomla installation and it will take few seconds to complete Joomla installation.

After that process you will redirect automatically at http://localhost/joomla5/installation/index.php?view=remove&layout=default; finally it’s looks like
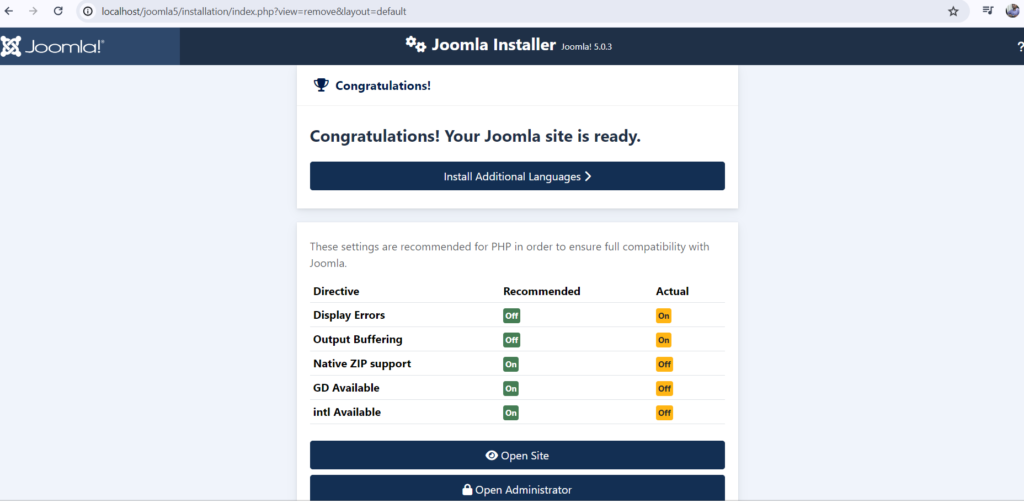
At the bottom of the page there are two links
1. Open Site — If you click on this the front-end of the Joomla project will open and
2. Open Administrator — If you click on this the back-end/administration will open.
Let’s click on “Open Site” and You will see an error
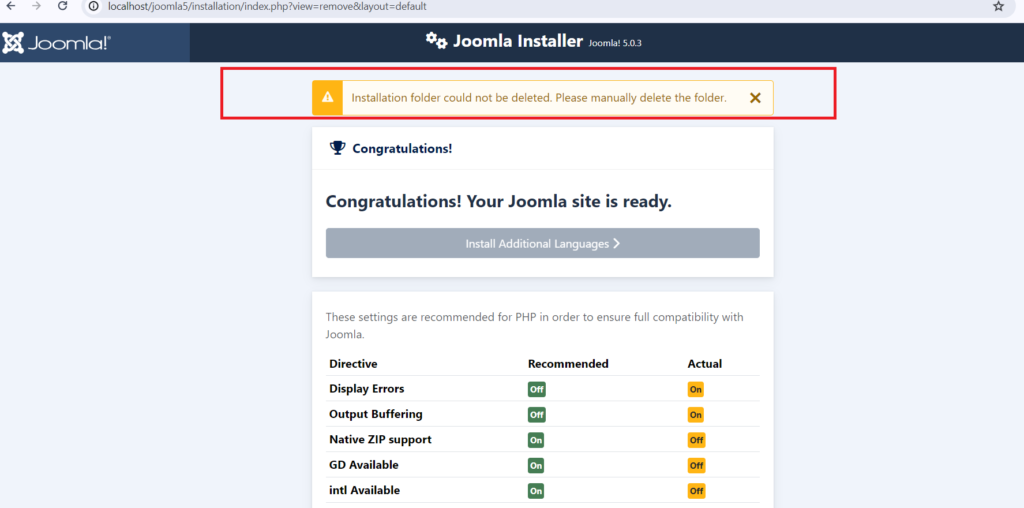
Though Joomla installed correctly, It’s happened because the “Installation” folder is in out project directory. Next, go to the project directory and remove/rename the folder “Installation”.
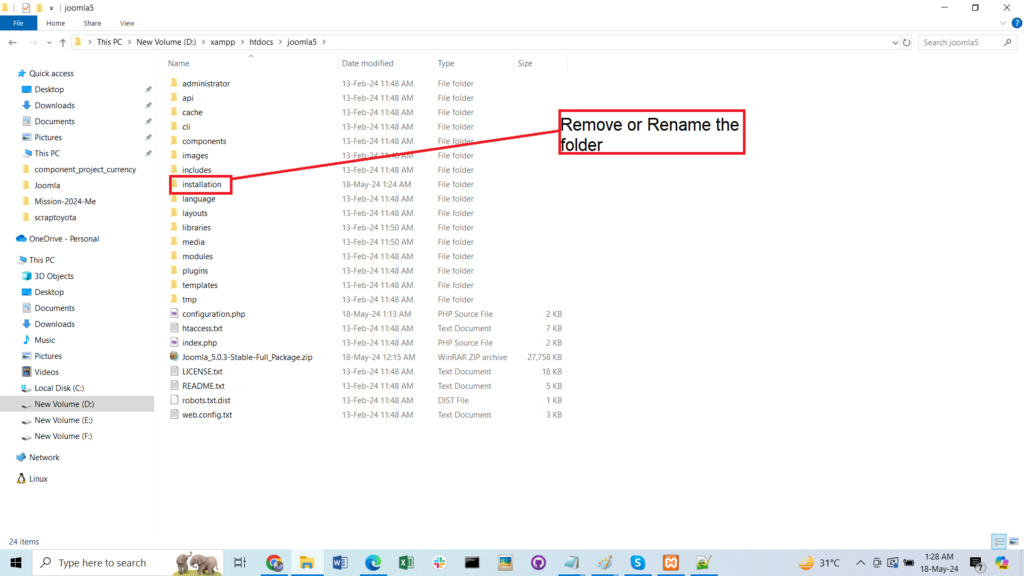
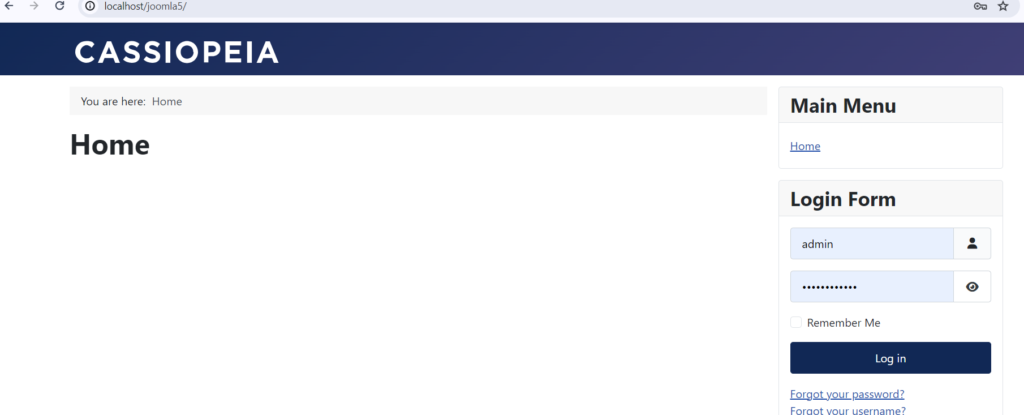
Now you are ready to go. Click on the “Open Site” and you can see the front-end. Congratulation!! Finally, Joomla installed Successfully.
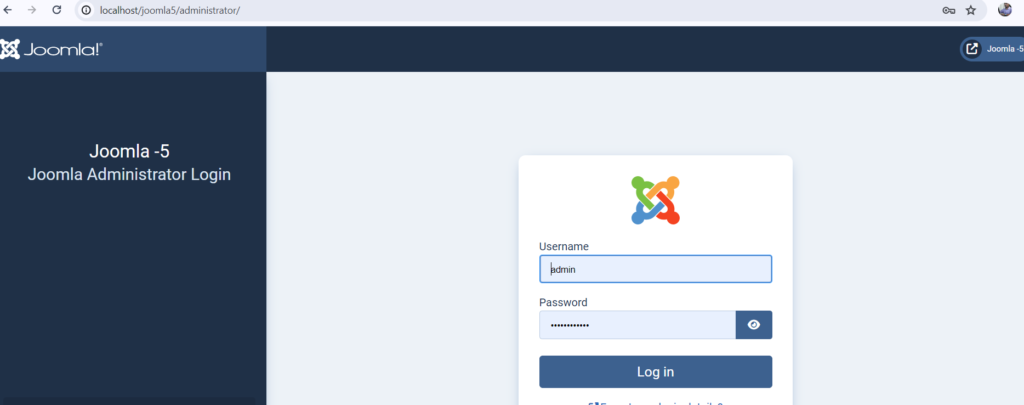
Click on “Open Administrator” and administration panel will be loaded. Please put your Username and Password to access the admin panel/backend.
We are done with our Joomla installation. Our Joomla is ready and you can build your website easily. In the next article we will discuss about “How to build a complete Joomla site without coding”.
If you have any suggestions or idea please let us know by the comment section.